Spiral Drawing
Create your own spiral pictures with this spiral plotter ,changing the angle and position of the rod you create different patterns. You can also change the direction of the spinning platter to alter the shapes created!
You’ll need two AA batteries ,a small Phillips screwdriver, small scissors and some paper to draw on.
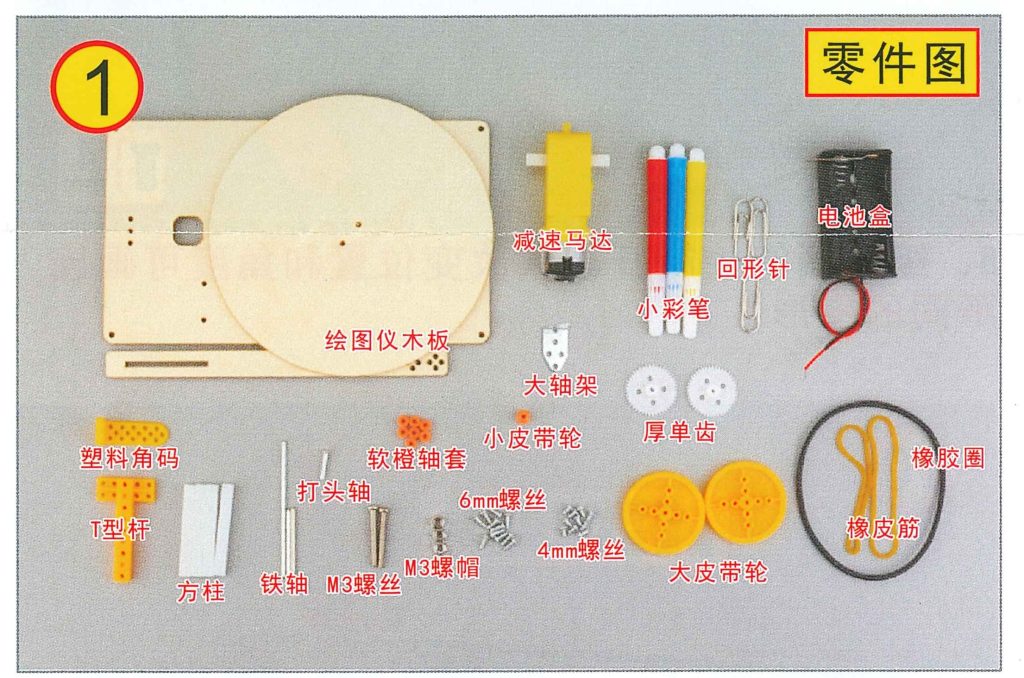
Check you have all of the parts before you begin.
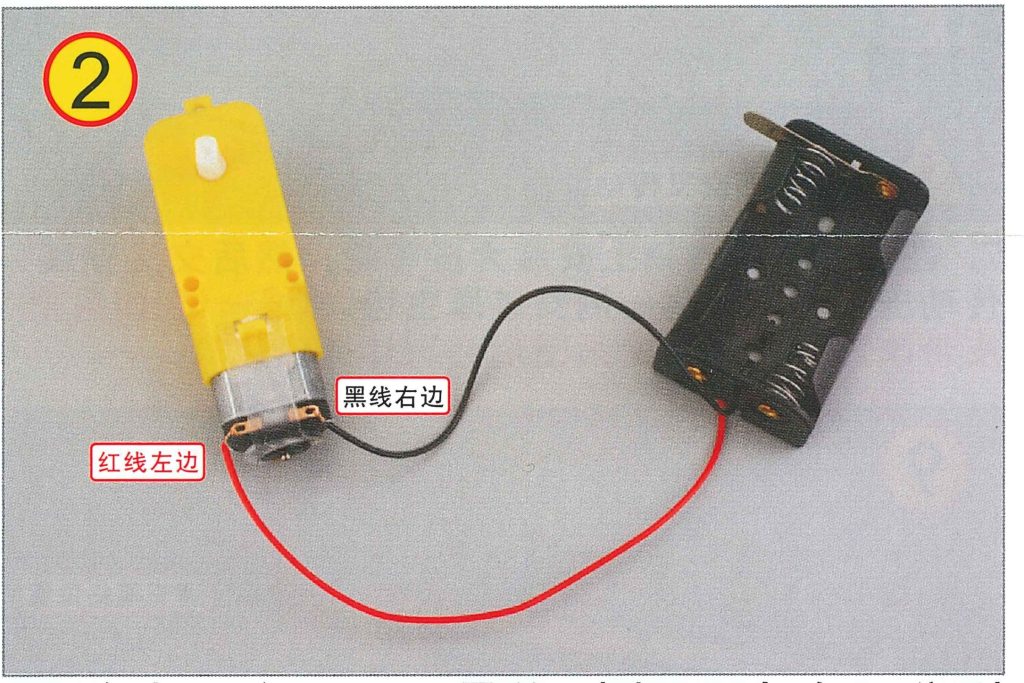
Connect the battery to the motor as shown. If the cable comes loose try adding sticky tape to secure the connection.
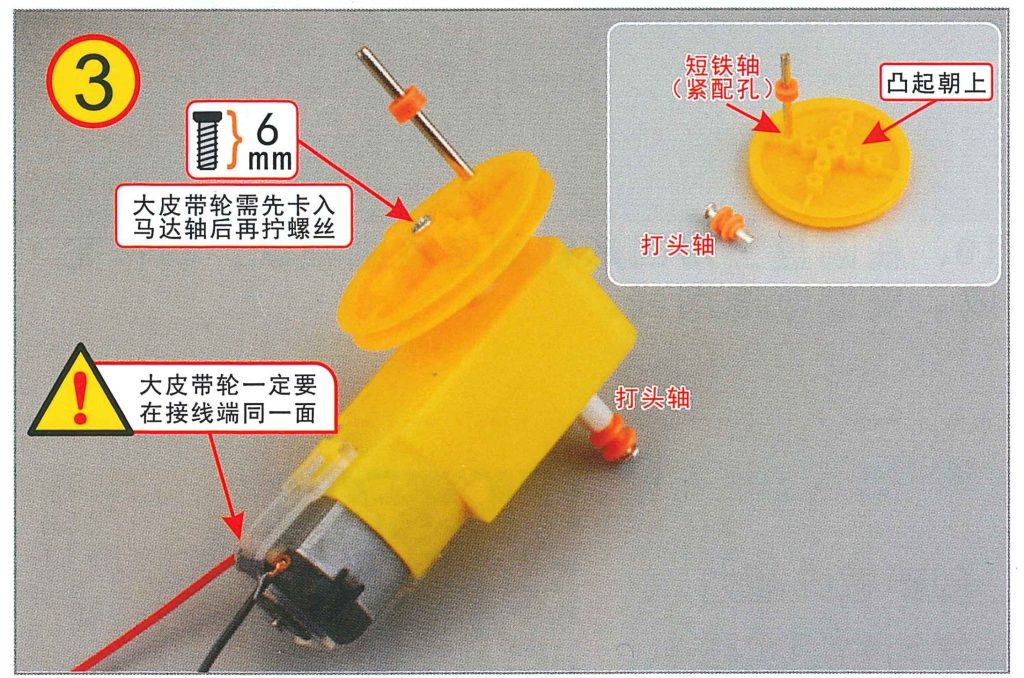
First look at the top right part of the image, you need to make the top and bottom part of axle. The bottom of the axle needs the small pulley. The top of the axle needs one of the orange large pulley wheels. Insert the metal shaft into the oragne pulley wheel as shown – it will be a tight fit. Attach the orange pulley wheel to the gearbox using a 6mm screw
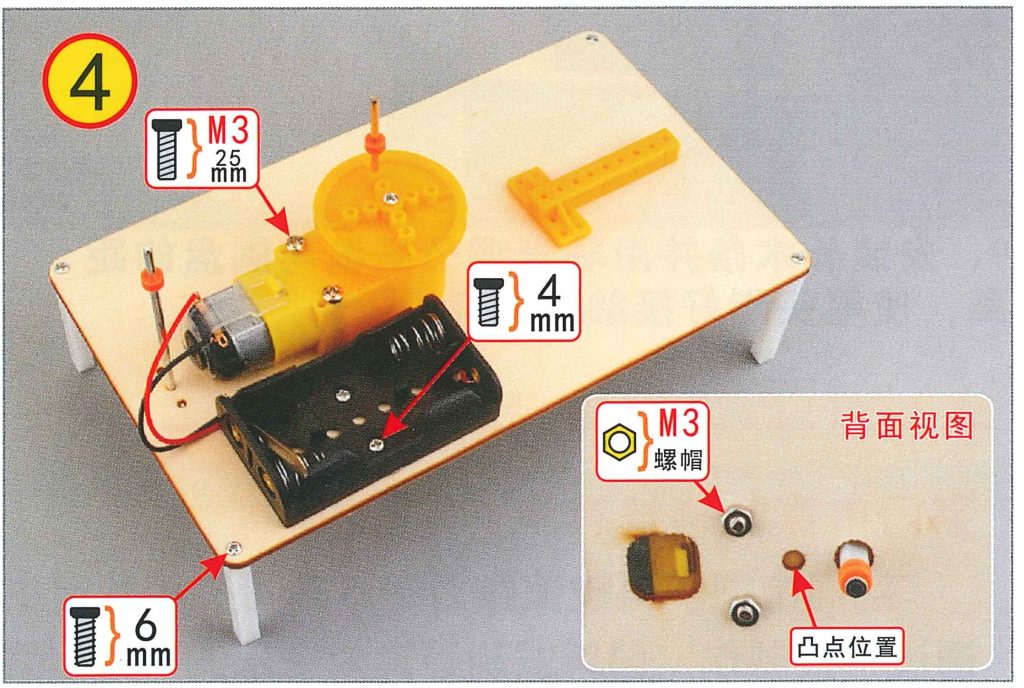
Look at the bottom right part of the image this is the underside view showing how the axle and gearbox are mounted to the base plate of wood. The small hole in the “triangle” of holes is for a small locating knotch on the bottom of the gearbox. First screw the four legs onto the wood base using 6mm screws. Second place the gearbox onto the wood base and use the M3 25mm screws and fix using the M3 nuts underneath. Thirdly attach the battery box using 4mm screws.
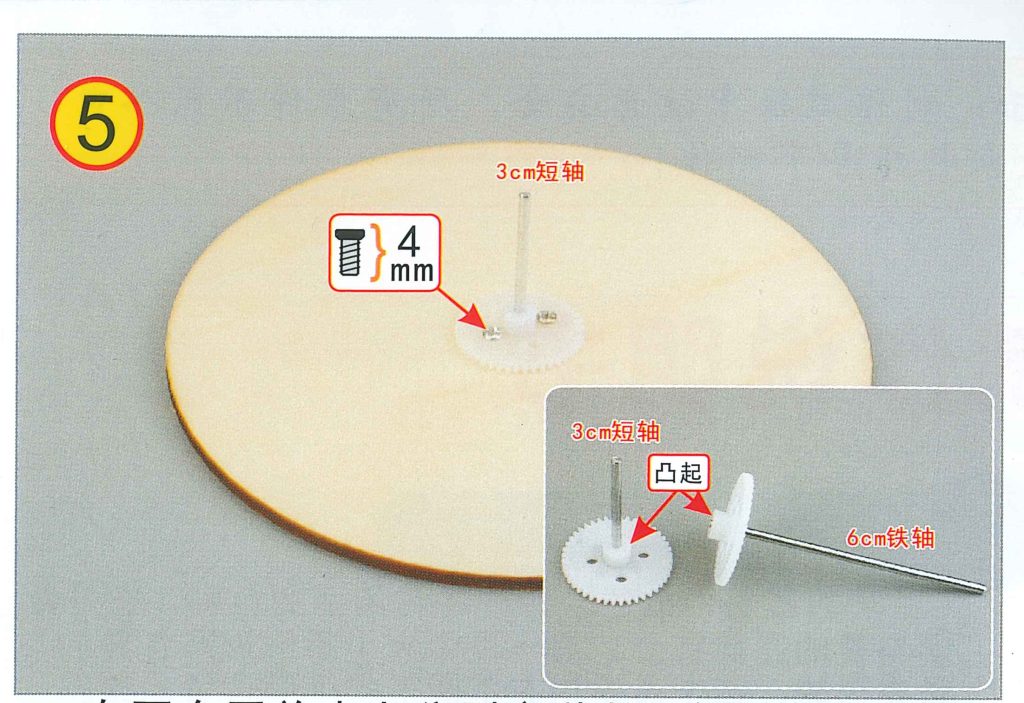
Now is a good time to draw around the wooden disc on some paper to plot your designs on. Insert the 3cm and the 6cm metal rods into the cogs – observing the raised part of the cog. Attach the 3cm rod and cog to the wooden disc using 4mm screws.
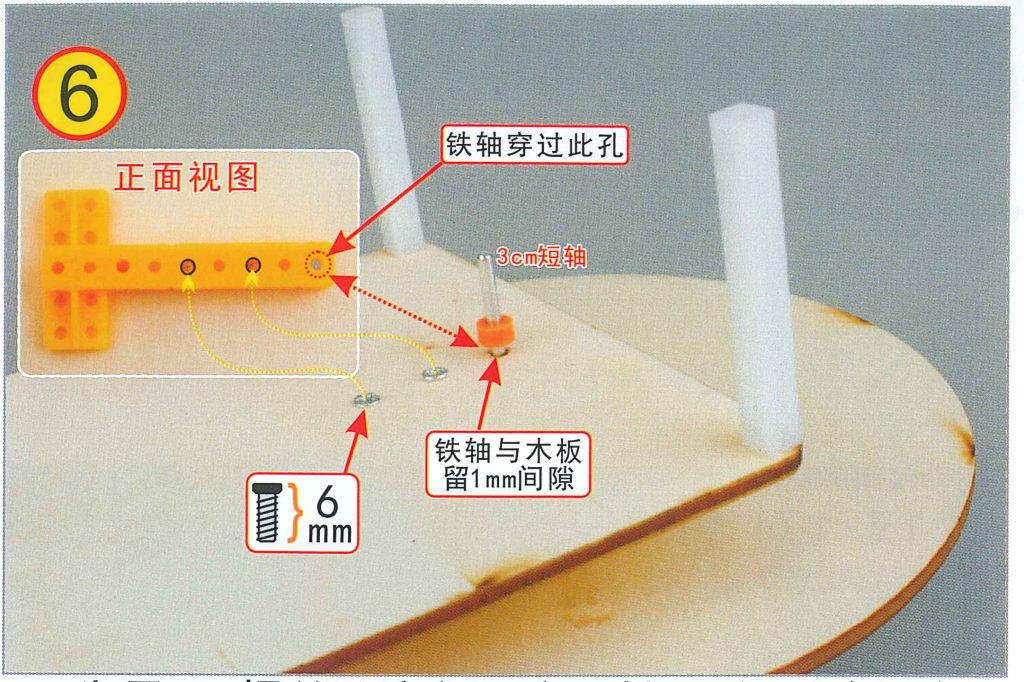
Attach the T-shaped piece of plastic to the base from the underside using 6mm screws. Place the wooden disc through the T-shaped piece and the base. The 3cm rod needs to be secured with an orange bead, leaving 1mm gap between the wood base.
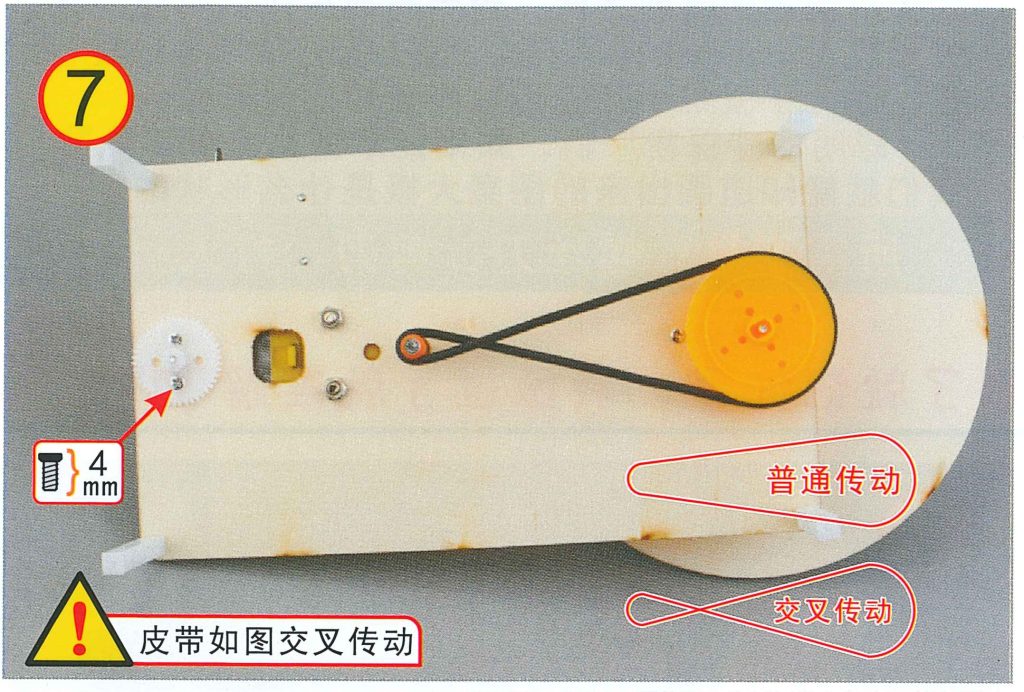
First install the other large orange pulley wheel as shown. Then install the elastic belt in the cross configuration shown. You can experiment later without the twist in the belt.
Secure the 6mm rod using two 4mm screws at the other end, this forms one of the pivots for the drawing arm.
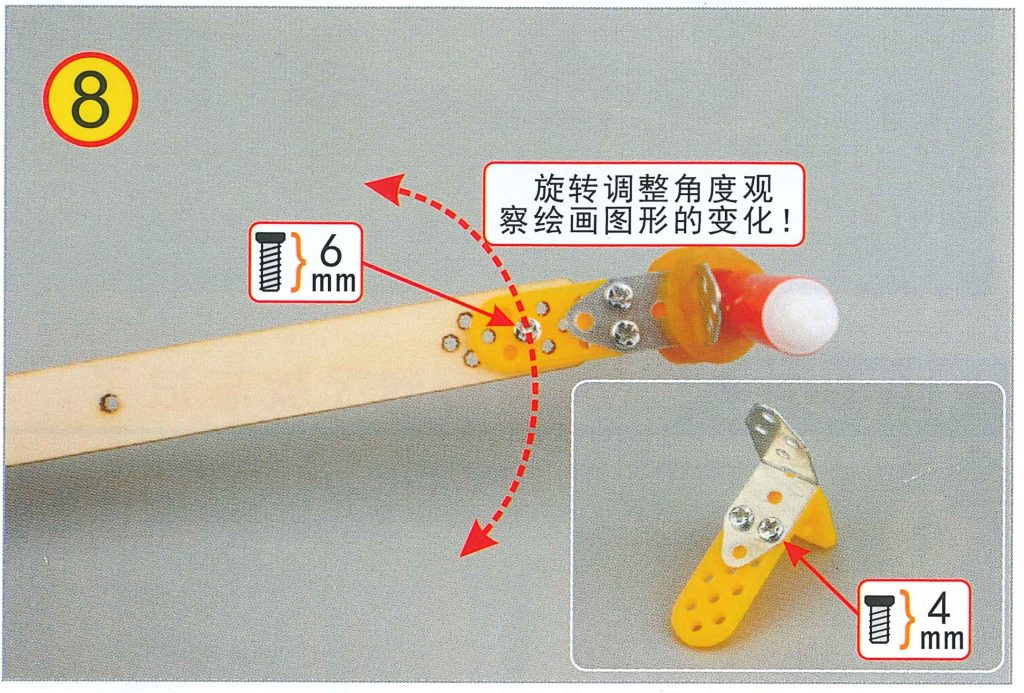
Now assemble the pen control arm. You can experiment later with the len in differant positions and angles to see the shapes that are plotted.
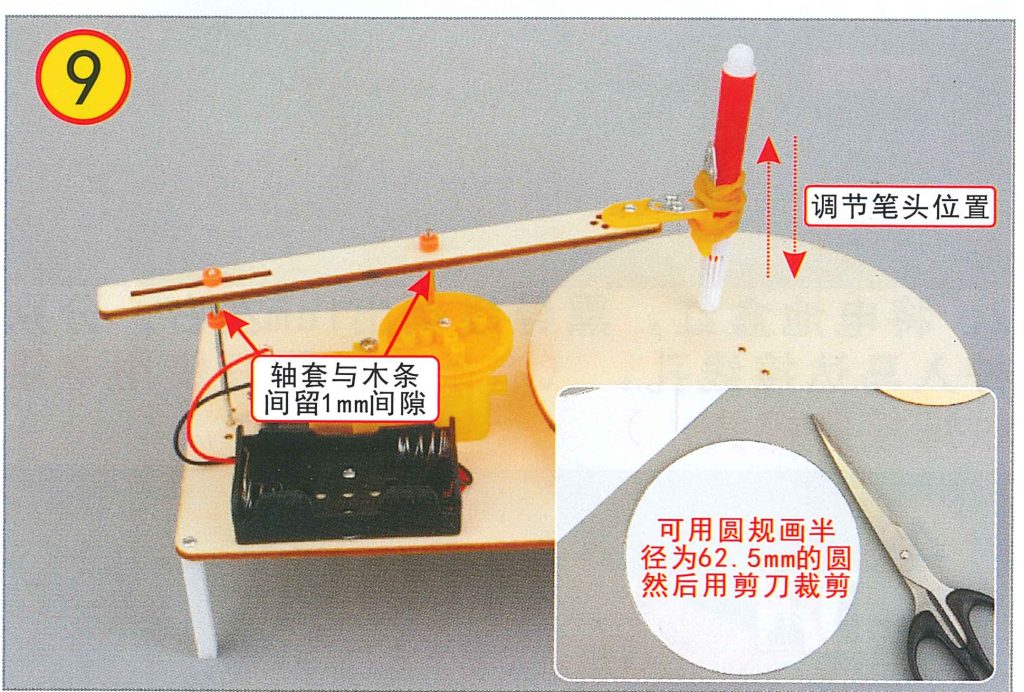
Install the drawing arm and secure with orange beads both above and below the arm. Attach the pen using the elastic band and adjust so it can draw on the paper.
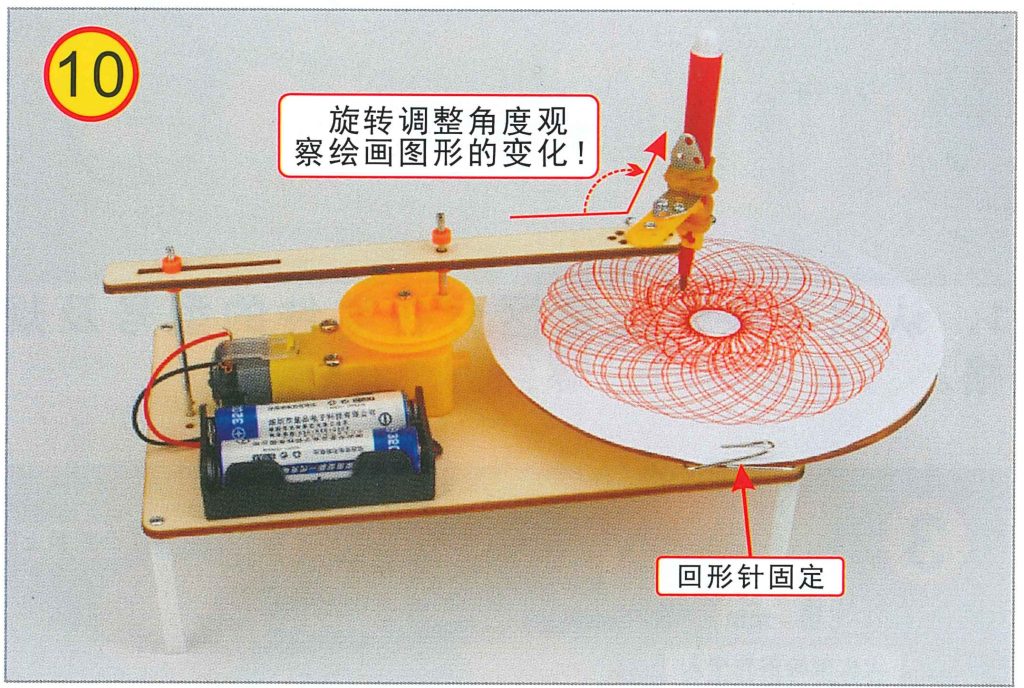
Attach the paper disc you have cut out securing it with the paper clips. Experiment adjsting the angle of the pen to see the differant shapes. Turn on using the battery holder and watch your kit draw!

